I will be using this blog to periodically document my journey through my third year FMP, explaining my thought processes and showing image updates as evidence of progress from week to week.
Category: fmp
Project update 1: Atlas! The journey begins.
This is the first major progress update for my Final Major Project since settling on the idea!
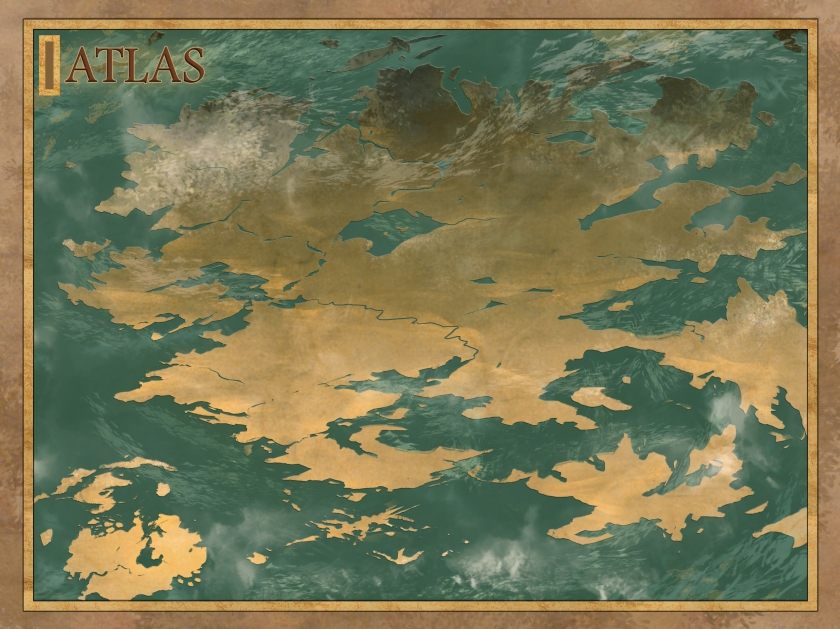
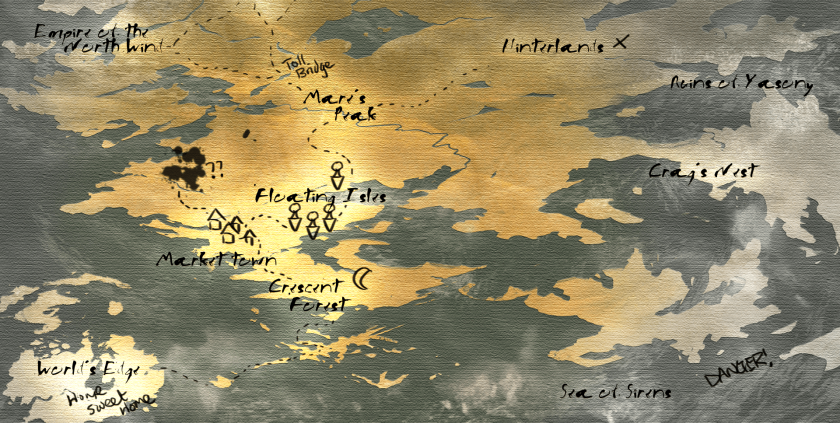
My FMP will be a worldbuilding-driven exploration of a fantasy setting, built to accommodate 2D and 3D elements though matte painting techniques. The project is titled Atlas; the narrative implication is that you, the player, are exploring and marking down locations as you travel, accumulating in a world map.

My plan is to aim to have 3 polished interactive scenes implemented by the end, though that scope may change as I get a better grasp of the timescales needed for this project.
The current locations I plan to do:
- Crescent Forest
- Market Town (to be renamed)
- Floating Islands
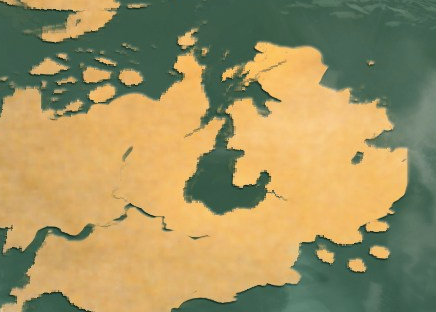
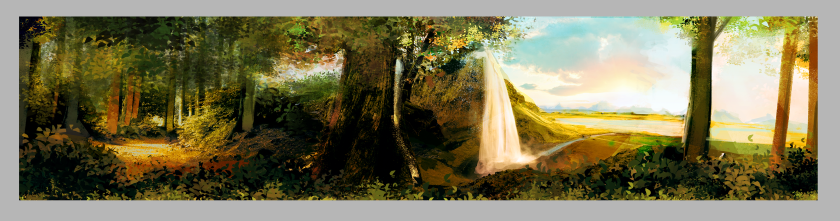
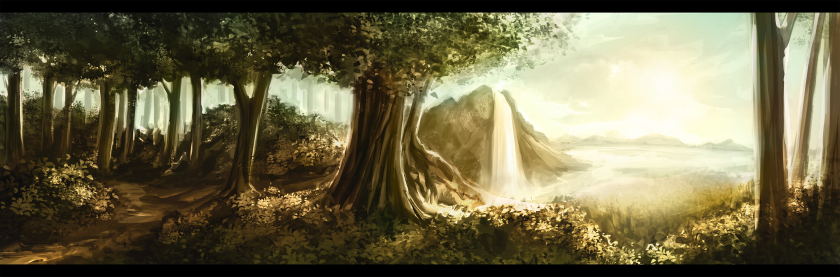
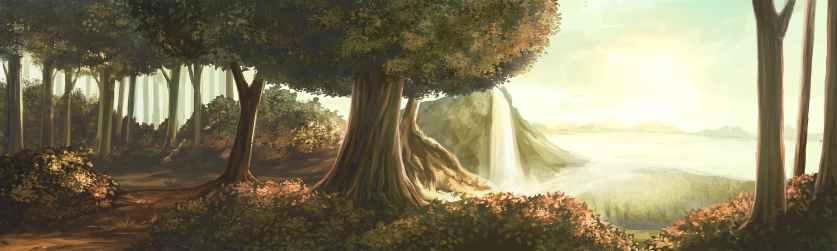
Location: Crescent Forest
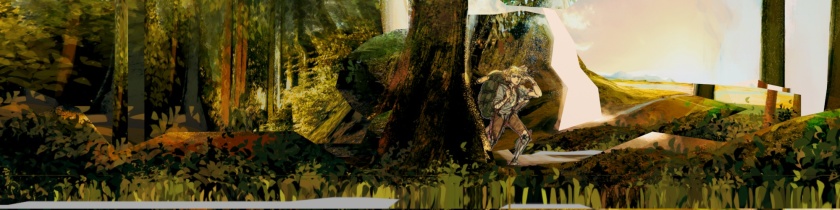
The first location I have decided on will be a wide camera shot of a sprawling outdoor forest scene, with lots of foliage and natural elements. It is based off the small corner island on the world map, where the forest wraps around the crescent moon-shaped lake.
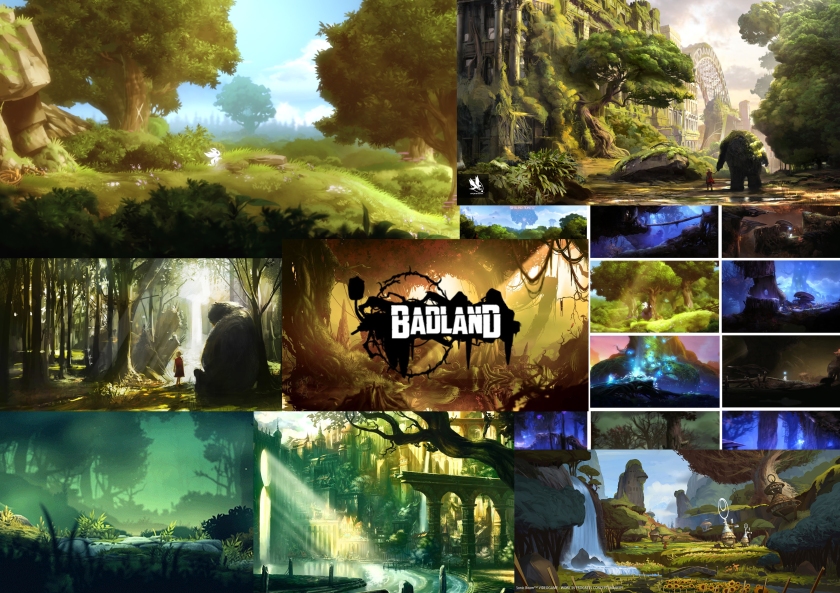
Moodboard:
I put together a moodboard of scenes from various games to get a better feel for what I want it to look visually. I’m aiming for a hand-painted feeling mixed with lots of detail and soft but vibrant colours.
Concept thumbnails and composition breakdown:
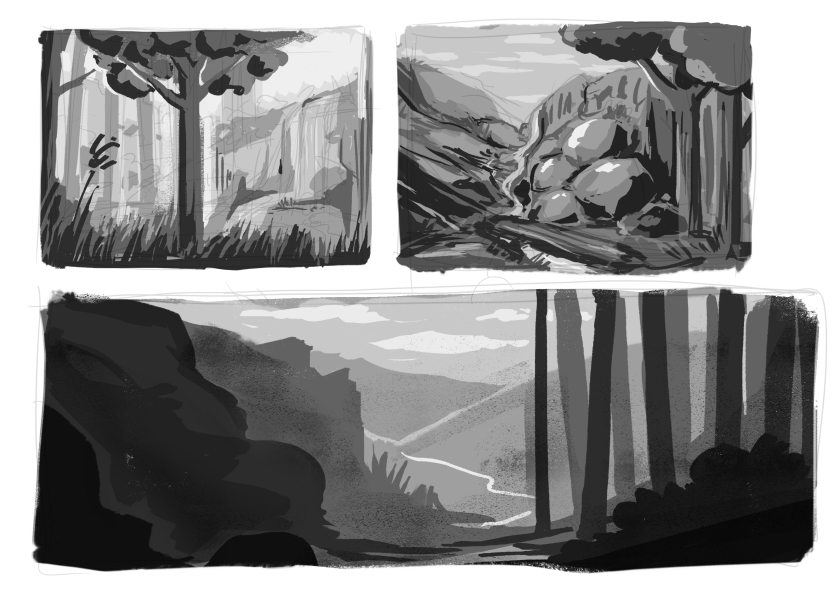
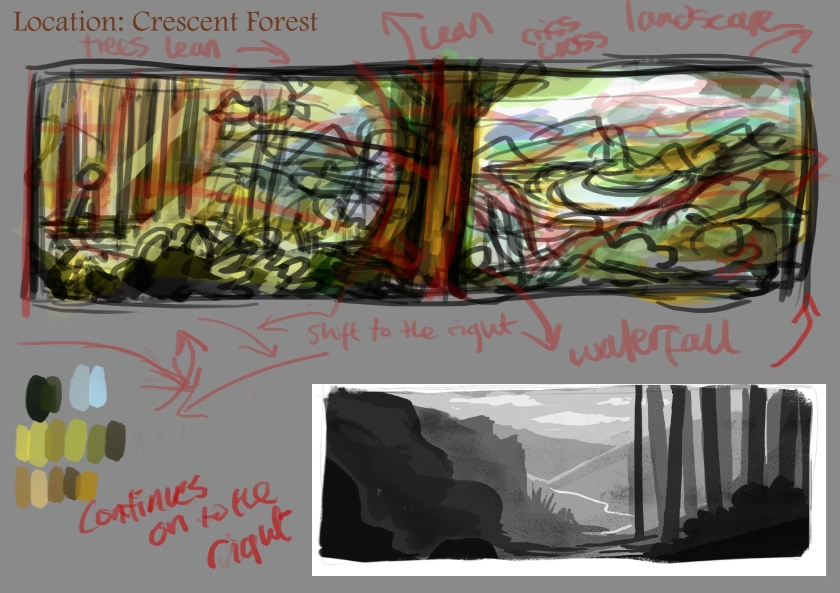
Through the course of creating thumbnail concepts and white-boxing in Unreal Engine 4, I decided that a long horizontal scrolling format would be the best way to display the parallax scenes in the project.
The next step will be to creating a more detailed concept of how the finished scene would look, then starting to separate all the pieces into layers and planning how to set it up with 3D elements in 3ds Max.
Project update 2: Building the forest.
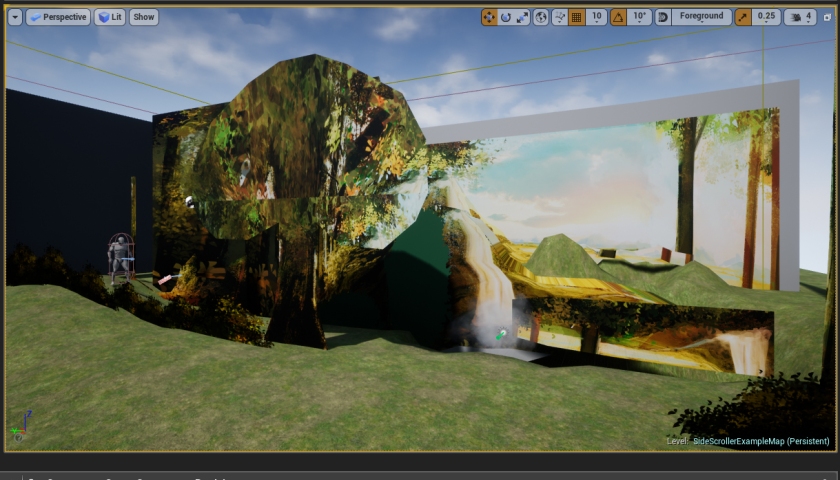
A month into the project now! In the past two weeks I have finished working on the concept art for the first scene and have blocked it out in 3ds Max.
I applied the concept art to separate planes in perspective mode to figure out how best to arrange the scene elements to give a faux 3D impression. The waterfall is one of the main focal points, so I decided to make it a 3D block rather than just a plane to really make it stand out. It’ll be a mesh with a texture applied to it, and then the water coming off it will be animated.

Wireframe screenshot.

Flat render screenshot.
In terms of animation, the foreground leaves will move slightly to the wind, the water coming off the waterfall will be moving, and hopefully so will the clouds in the background (as a tiling texture shifted along the X-axis)
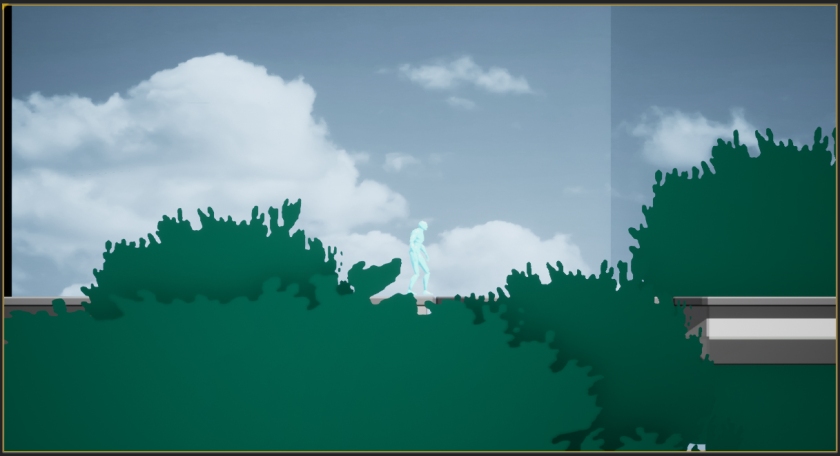
Character
I’ve been playing with the idea of having an adventurer-type character in the scene for a while now, so I’ve made a quick sketch of one to put in the blockout scene for scale comparison.
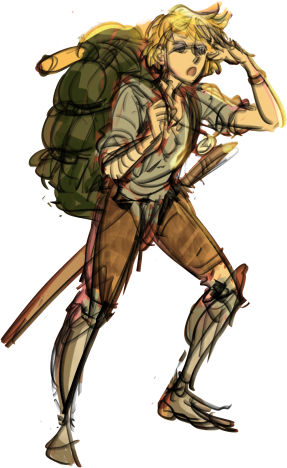
I plan to work into the character more when the first two scenes are completed. But for now, he’s a young adventurer from a remote island, travelling with the aim of completing his map. His equipment is basic and rough, highlighting his inexperience.
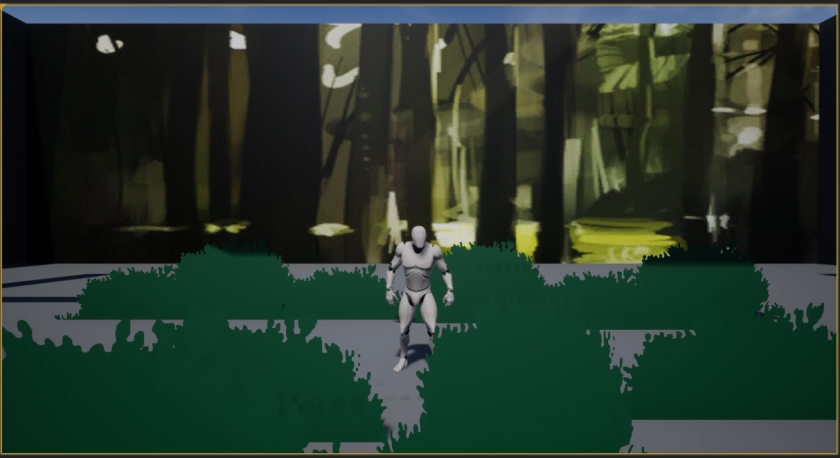
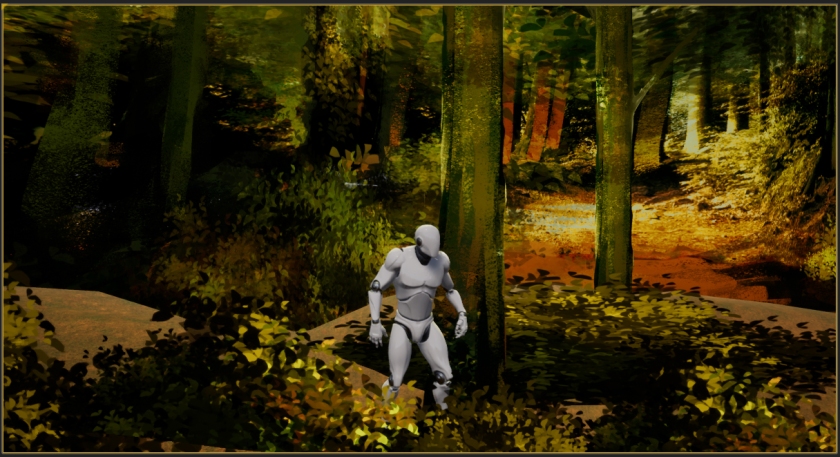
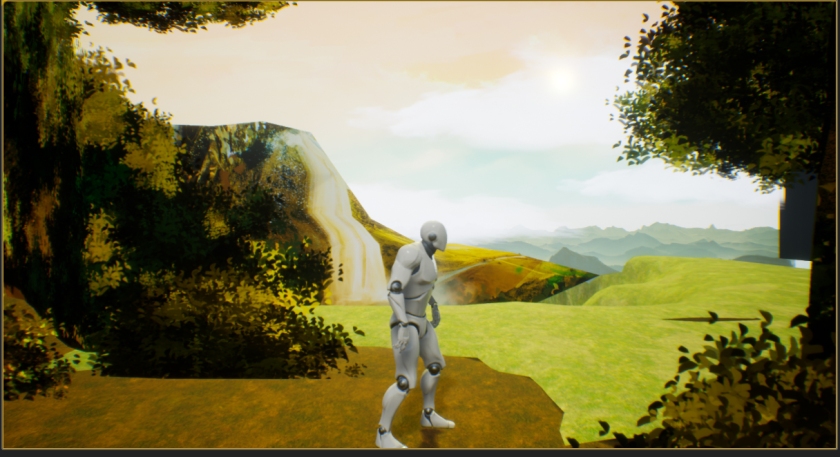
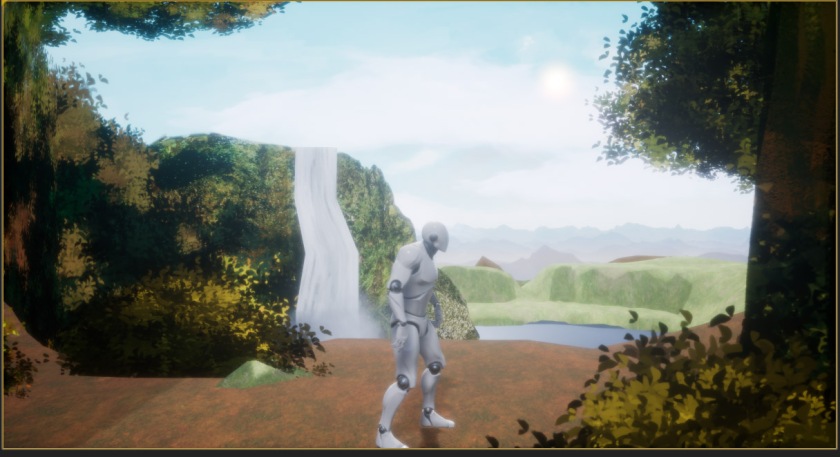
Here are some scene renders from Max with the added character, making sure it all comes together.
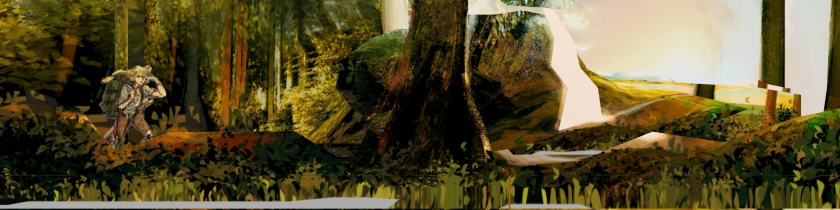
After some thought I settled for the 3D sidescroller mode in UE4 as a starting point because it seemed more flexible than the 2D sidescroller mode. I added a floor and sculpted it a bit to add more depth.
At this point I am wondering if I should extend the map for the first scene slightly or slow down the player movement. Right now it takes roughly 5 seconds to get from the left side of the scene to the right. The next step will be to to create the actual art for the scene and start replacing the placeholders in Unreal.
Project Update 3/4: Plans, plans, plans.
This is a double update to make up for the one I missed 2 weeks ago. After pitching my progress to my tutors, the feedback I received was mainly to get a more solid plan together and set specific tasks with time constraints. I needed to set clearer goals. So instead of “I will complete the first environment by Christmas break”, that goal should be split up into individual tasks to be done by each week.
Art Update
After looking at the level I built, I saw that the use of colour was a bit too over the place. When the light sources were added in engine, it didn’t achieve the style that I wanted. So I decided I wanted to push the colour scheme to something more unified with a more polished concept. I limited further limited the palette I was using here, making the blues in the older concepts more green and oranges more yellow. I’ll be updating the art assets to fit in with it.
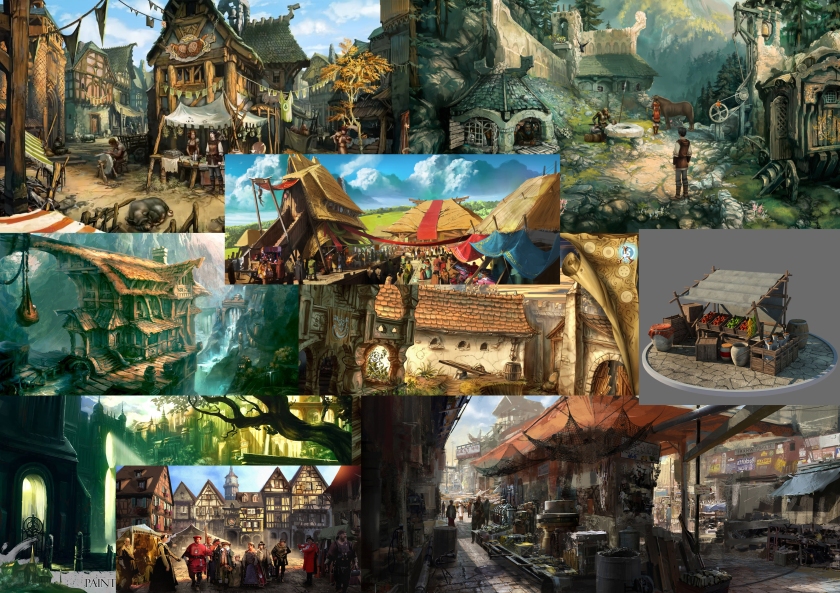
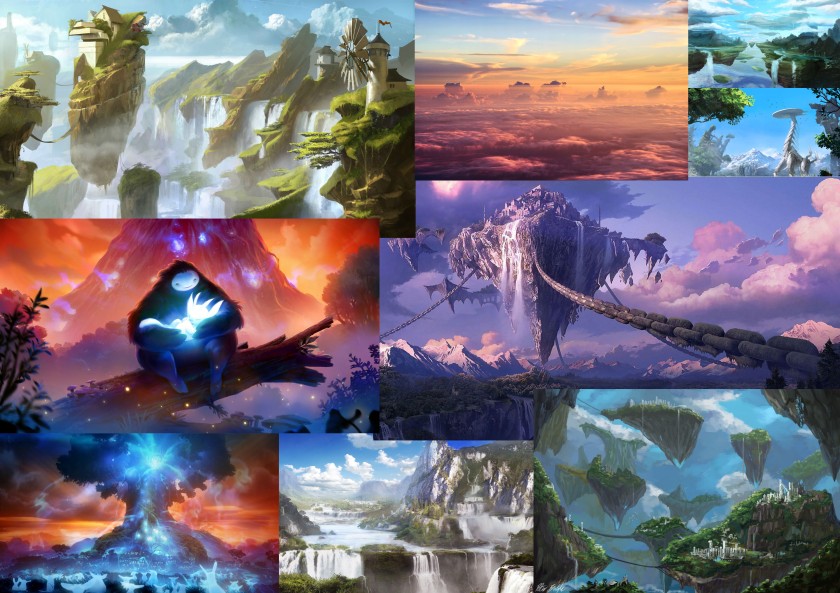
I also started putting together moodboards for the next two locations.
Location 2
Location 3
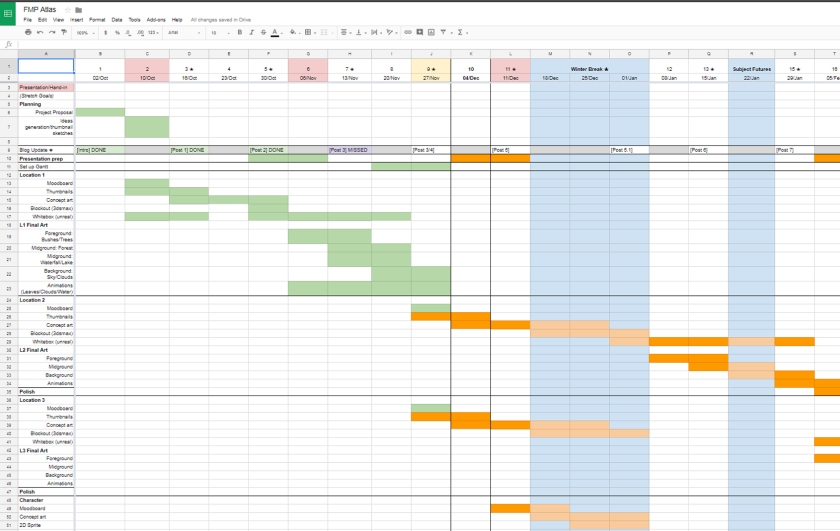
Project Planning
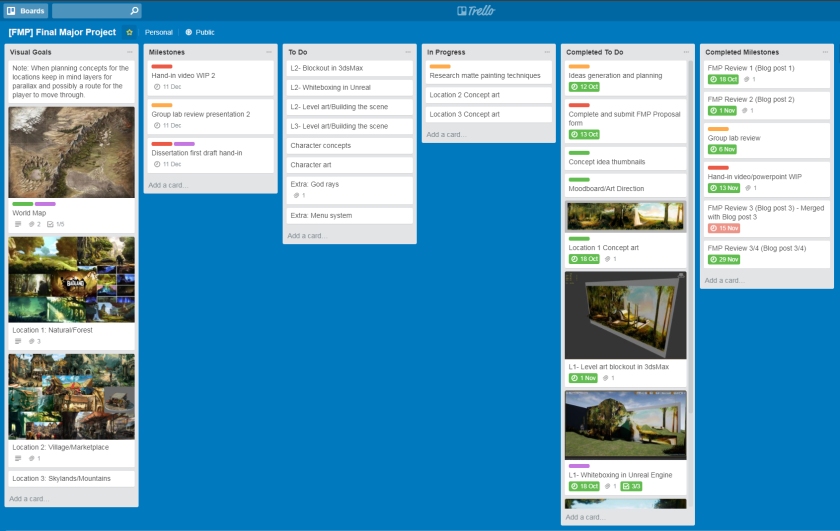
To achieve better planning, I have put together a Gantt chart breaking down the tasks that I need to do into more detail- from what I’ve already done to what will need to be done up to the deadline dates. I will continue to update the chart each week as I make progress through the project. I will still be using Trello to mark off when each major task is done, but I will mainly go by the chart to keep track of what needs to be done.
Trello
New Timetabling
Using my progress with the first level as a reference point, I made a plan to estimate how much time I would need to complete the next two, taking into account that I will be more familiar with the workflow as well as the increased complexity of the new levels.
I will also be doing the planning stages of locations 2 and 3 at the same time to make the ideas and art style more uniform. Next I plan to finish off the level-building for location 1 and complete the thumbnails and concept art for locations 2 and 3. When Winter break begins I hope to have the thumbnails done and be started on the second concept art stage.
Project Update 5: New areas!
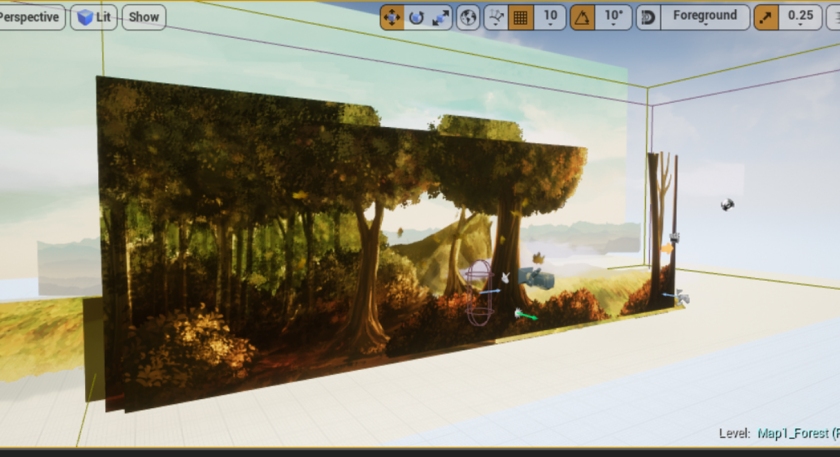
I updated the artwork for the first scene with new art, fixing some of the style inconsistencies and separating the layers out into groups.
Onwards!
With the art for the first level completed and put into Unreal, I started thumbnailing some concepts for the next two areas. For the market I wanted to try a bit more complex perspective, as well as include lots of different visually interesting items in the market stalls. The top left and bottom left compositions appealed to me the most.
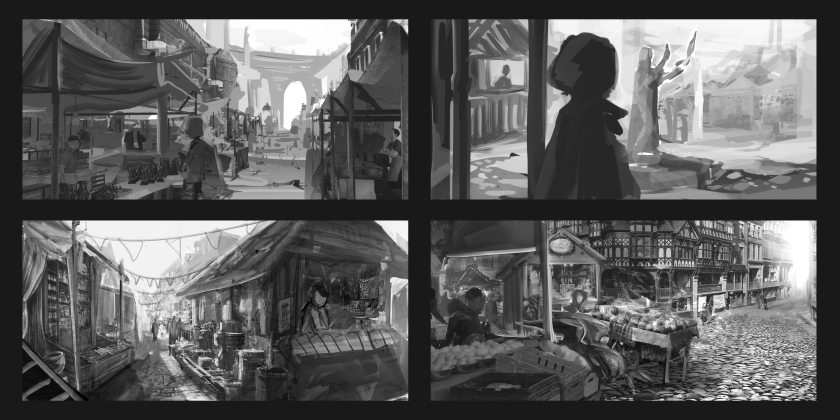
Here I played around with possibly having different one or many different focal points in a more epic landscape view. I liked the idea of having some of the larger islands populated, with whole cities built on top.
Over the Winter Break I plan to complete the coloured concept art for the next two levels and if everything goes smoothly to plan, also start the Marketplace blockout in 3dsMax. Another possible thing to add to the first level could be small animations such as birds flying.
Project Update 6/7: Welcome to Market Town.
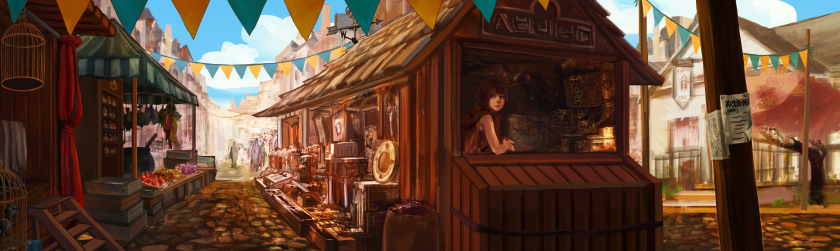
Another double update since I’ve been focusing on concepting the second level, the Market area. I worked on a coloured concept that combined bits of the thumbnails I liked, blocking it out as well as creating a character for it but as predicted, the perspective has been tricky to deal with.
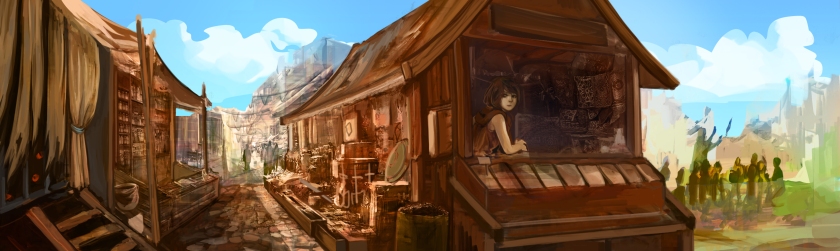
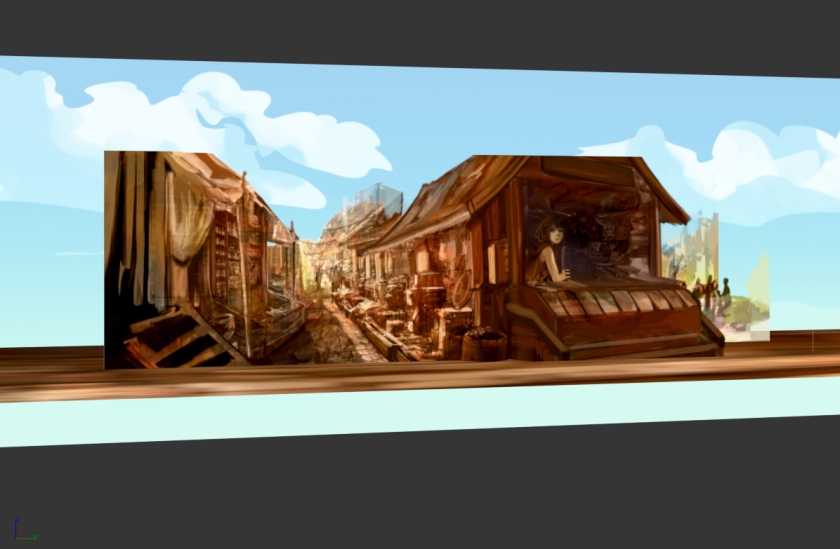
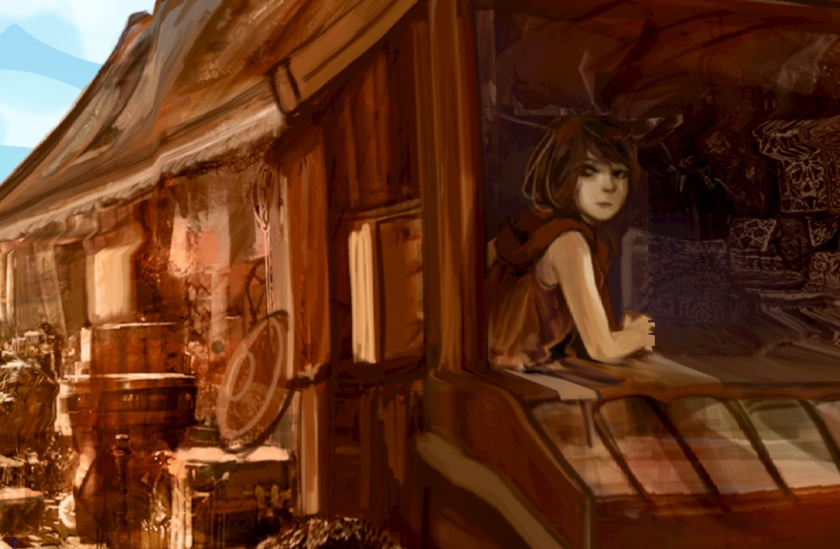
With the blockout, I realised that I would have to extend the canvas in order to not break the scene when you moved to the edges of the level. I also realised I was lacking something in the foreground, so added some bunting poles.
I may need to change my GANTT chart plan to take an extra week or two on this second level to really make sure it all works properly. The next step is to create the actual level artwork using the concept as a base, and then start white-boxing and testing in Unreal.
Project Update 8: Now open for business.
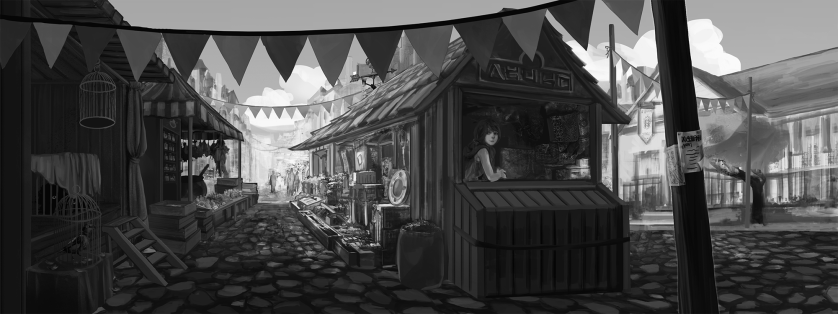
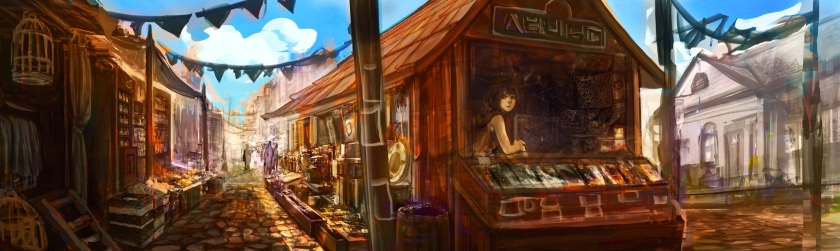
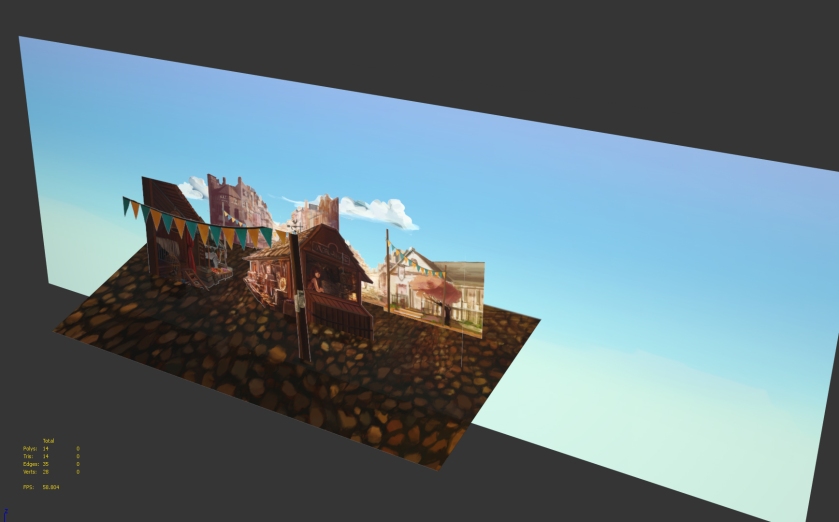
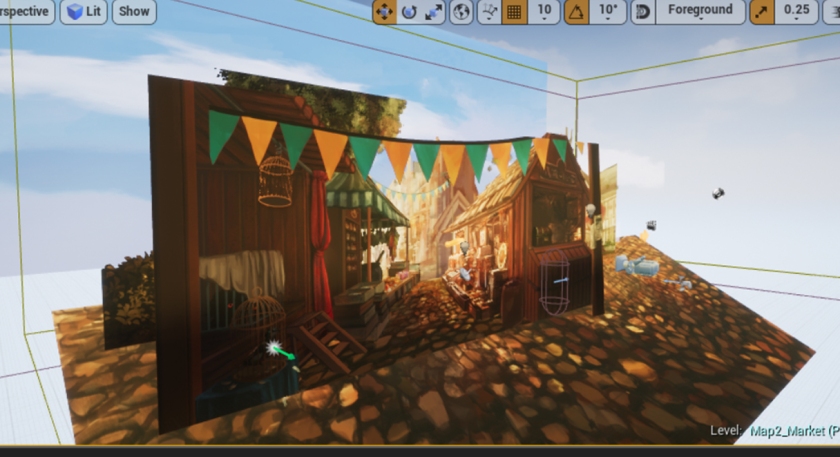
I finally completed the final artwork for the second area and got it to a standard that I was happy with in Engine. It took longer than I expected but it was an interesting challenge to work with more complex perspective than the previous area. Though it may seem like it, not all the background areas join up.

I did extensive testing for this level, moving back and forth between 3dsMax and Photoshop until everything worked and lined up properly. The canvas for the artwork was extended so background assets didn’t just cut off near the top of the screen.
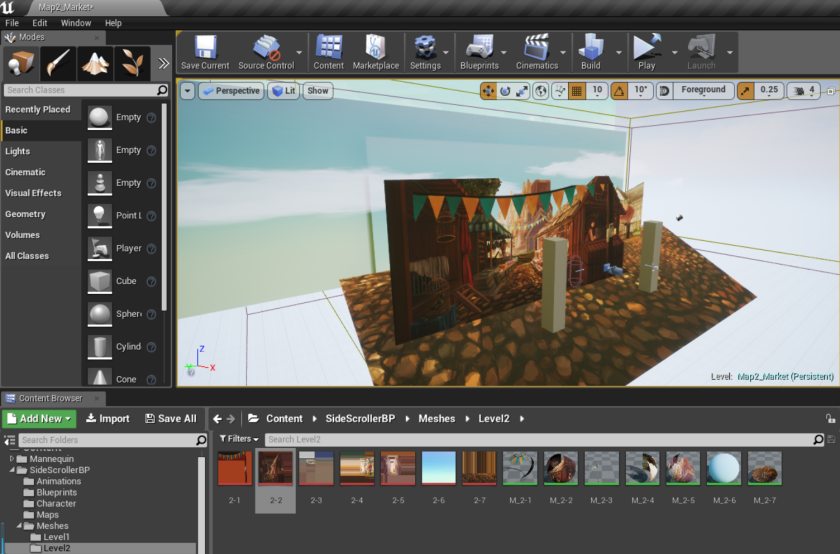
And all the hard work doing testing paid off! Once the level assets were in Unreal, they worked without a hitch. Compared to the forest level where I had to mess around with the asset composition a lot in-engine, there was practically no change in the transition between 3dsMax to Unreal. To keep things consistent, I reused some of the cloud asset from the first area.
The next step is to push ahead with the third level. I’m confident that after the experience I gleaned from doing the Marketplace that I can reduce the time I was going to take with the third level.
Project Update 9: To the skies!
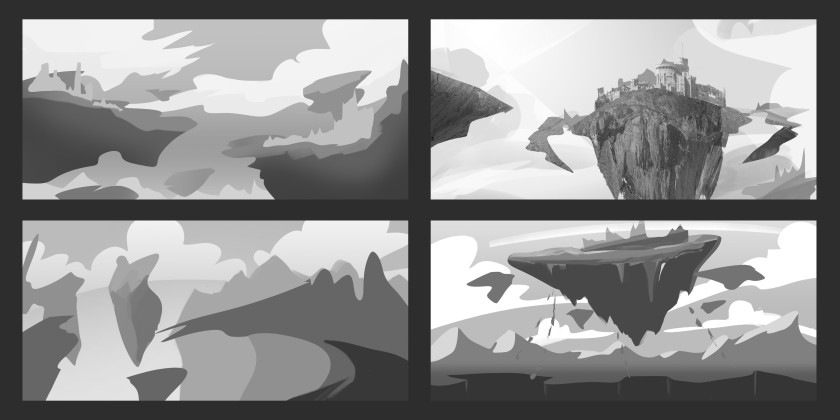
I started composing the thumbnails for the Floating Islands together like I did with the second level. It ended up with multiple populated islands with different types of buildings on each. I also quite like the idea of the people being able to travel from island to island using things similar to ski lifts.
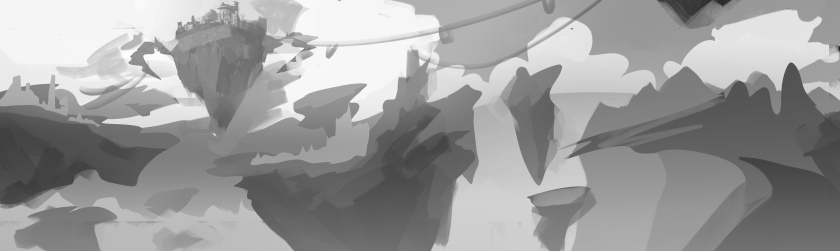
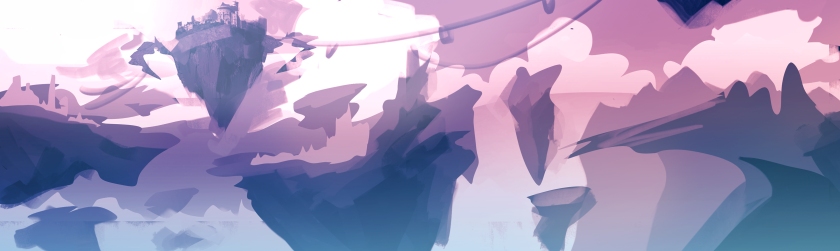
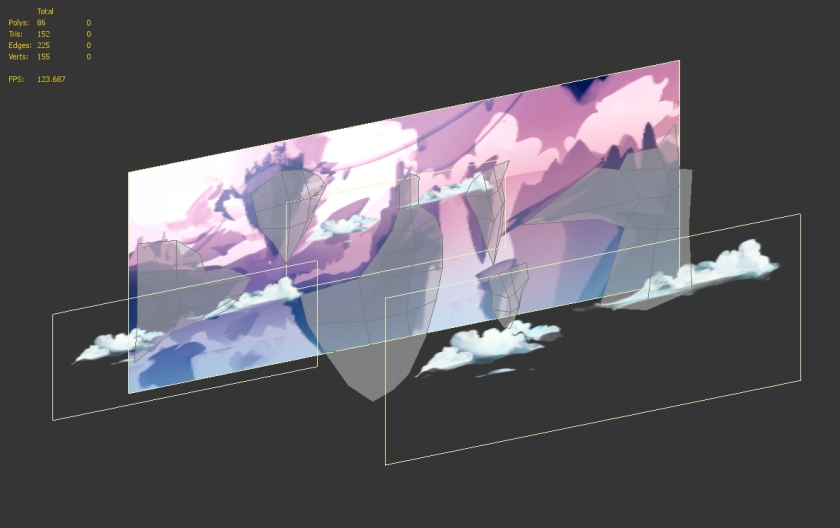
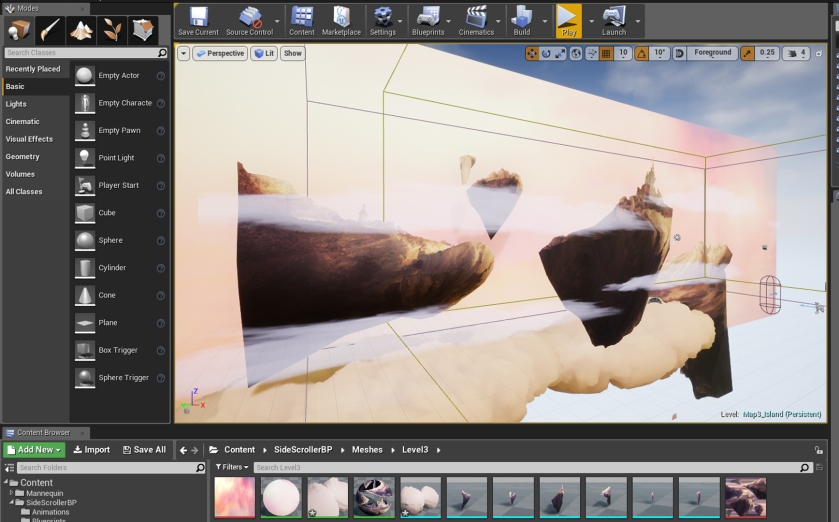
Here I wanted to try something a little different to the previous two levels. Instead of having the islands at the same distance away from the player on the same plane, I separated them out and shaped them with simple geometry. The idea is that the islands will have fake depth and small protrusions in the plane geometry will make the islands appear more 3-Dimensional. Having them separate will also allow me to move them individually if I want to resize or make them move.
With just over a month left of the project, my main focus is to get the artwork for L3 finished and implemented in the next two weeks before starting the polishing process: adding particle effects and small animations during the Easter break. As a stretch goal, I want to add a simple rollover text mechanic and navigation menu in Unreal to boost the narrative.
Project Update 10: The final stretch.
Final update before Easter break and the last stretch!
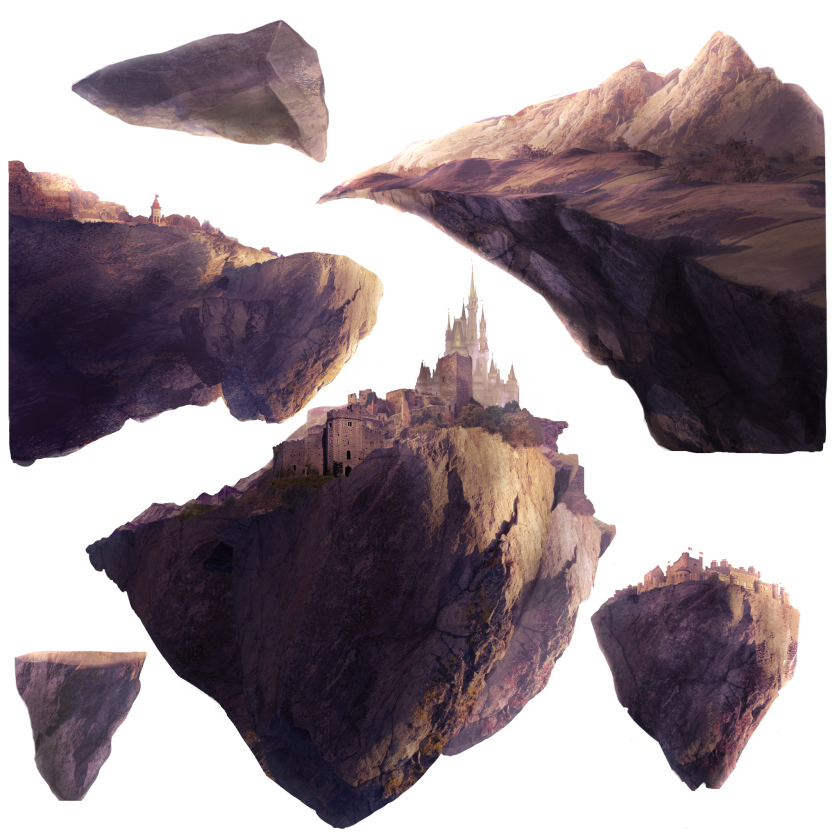
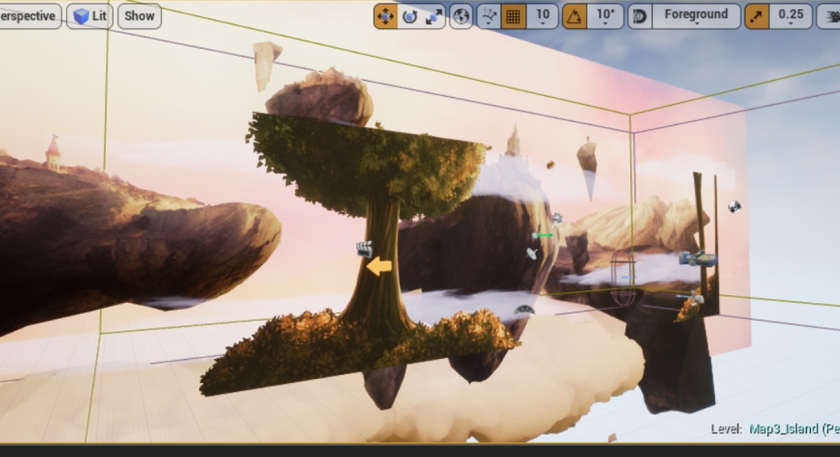
I finished the island artwork for the third level and started bringing it all into Unreal. The good part about splitting the islands up is that I can now fit them all onto one texture and have the option of reusing some of the smaller floating rocks to create a more interesting scene.
I’ve started the polishing process now, fixing small problems in the textures and trying out cool new blueprint things in Unreal such as dynamic clouds that animate when moved.
My plan over Easter Break is to delve into blueprints and polish all the levels.
Project Update 11: The journey ends…?
This is the final blog post for Atlas Saga- it’s certainly been a learning experience from when I first started this project a few months back! These final couple of weeks have been a busy polishing stage- there are a lot of things added or fixed to improve the project levels.
Firstly, the individual areas with a comparison to the original moodboards and what the levels looked like before.
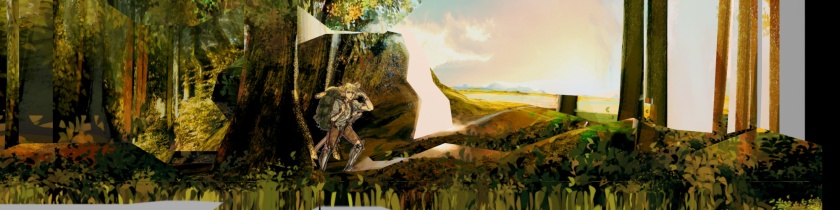
Level 1 Crescent Forest


- Polished and updated the artwork in general, adding more detail and introducing slight slants in the tree trunks, resizing and moving layers around where necessary
- Added post-processing overlay to give the scene a warmer feel
- Added a leaf particle animation
I’m quite pleased with the improvement in this level, especially as it’s the first area people will see. It looks far closer to the moodboard images than it used to and the post-processing really brings it all together.
Level 2 Market Town


- Reused some of the assets from the first area (trees, clouds) to give the scene a more cohesive feel
- Fixed the lighting to brighten up the scene
- Edited the artwork where the perspective didn’t fit, took the shopkeeper out and replaced with a treasure box
- Added small particle effects- the leaves from level 1 in the background and some feathers falling from the caged bird in the foreground
- Added animation to the birdcage hanging from one of the stall roofs so it sways in the breeze
This level ended up leaning more towards warmer tones than most of the images in the moodboard, but I think that works better for my project. The fixes made were small since most things didn’t need to be changed.
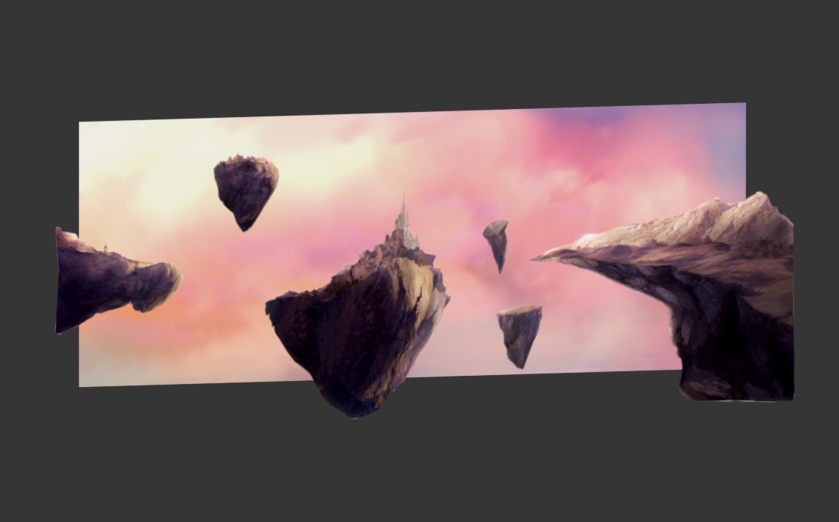
Level 3 Floating Islands


- Some colour corrections, some re-adjustment of assets
- Added a tree from the first level, again for cohesiveness and to create another layer of interest
- Added particle effect for leaves
- Animated the smaller islands moving, bobbing in the wind
The changes made here were also minimal since it was the level I worked on last. I think the slightly pop-out geometry of the islands was a good way to go and if I had more time I would go back and introduce some of it to the other areas.
Extra additions
In my first presentation I said that I wanted to create a fantasy visual exploration experience using matte painting techniques- a combination of 2D and 3D. But I felt like I could do more to tie it all in together.
Some stuff I added to the overall project to make it more game-like were:
- Added music
- Added a working menu screen when the project starts-up
- Implemented the map art as a loading screen between levels
- Set up a navigation system from level to level via little floating arrows. Click on them to move between areas
- Set limits for the camera so that it doesn’t show areas of the scene that shouldn’t be seen


Overall I think the project makes for a nice little interactive experience, a quiet exploration of a fantasy landscape, which is what I was aiming for to begin with. It’s been a long journey to a great result.
Future plans…?
There are things that I planned to have in the project that sadly didn’t make it in time for the submission of this FMP, but that I have a lot of ideas that I may continue to work on and develop further in the future. These include:
- An animated character to move about on the scene
- Point and click style rollover UI, bringing up flavour text when the player rolls over an area of interest with their mouse
- Character-object interaction! Pick items of interest up and add them to your knapsack
- Interactive map that grows as you explore more areas
- Different music for each different area, and possibly more ‘transition areas’ to bridge the change in style between each level
- And more areas to explore on the map!
- A holy temple dedicated to the Goddess of the Moon
- A dragon’s lair deep in a mountain cave
- A ship making its way through siren-infested seas
- An encounter with Frost Giants in the North…
